驗證 10G+ 資料集 JOIN 小表的執行結果

執行環境

  • 在 VM 上建置 K8S cluster 環境,有 4 核 16G 兩台,2 核 8G 一台

  • 於 K8S cluster 部署 Kubeflow Spark Operator

  • 於 K8S cluster 部署 minio

生成有 data-skew 的待測資料

1
2
3
4
5
6
7
8
9
10
11
12
13
14
15
16
17
18
19
20
21
22
23
24
25
26
...

TOTAL_ROWS = 250_000_000 # 10GB 約需要 2 億到 3 億筆資料 (視壓縮率而定)
SKEW_RATIO = 0.8 # 80% 的資料會集中在少數幾個 material 上

df_skewed = df.withColumn(
"material",
F.when(F.col("id") < (TOTAL_ROWS * SKEW_RATIO), "M_0001").otherwise(
F.concat(F.lit("M_"), F.format_string("%04d", (F.rand() * 10000).cast("int")))
),
)

df_final = (
df_skewed.withColumn("line", F.concat(F.lit("Line-"), (F.rand() * 10).cast("int")))
.withColumn("machine", F.concat(F.lit("MC-"), (F.rand() * 50).cast("int")))
.withColumn("module", F.concat(F.lit("MOD-"), (F.rand() * 5).cast("int")))
.withColumn("slot", (F.rand() * 20).cast("int").cast("string"))
.withColumn("product", F.concat(F.lit("PROD-"), (F.rand() * 100).cast("int")))
.withColumn(
"status",
F.expr(
"case when rand() > 0.99 then 'ERROR' when rand() > 0.01 then 'OK' else 'UNKNOWN' end"
),
)
.withColumn("count", (F.rand() * 100).cast("int"))
)

驗證結果

方法 1:pandas

與 spark 設定同樣的 memory 限制條件,出現 OOMKilled
pandas-oomkilled.png

方法 2:spark

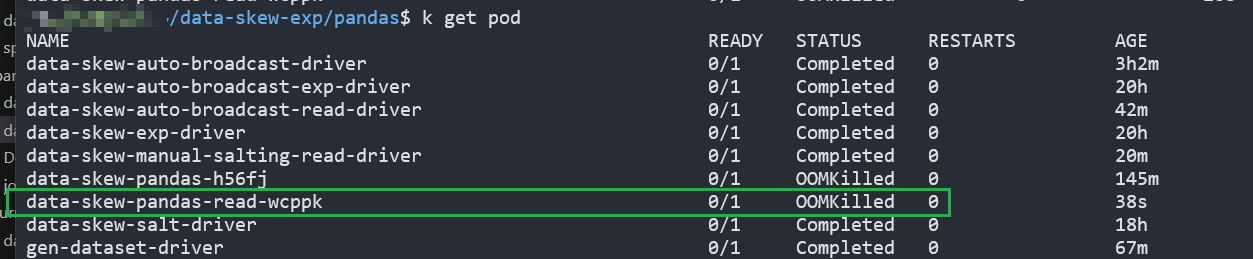
spark 預設的 autobroadcast 表現最好
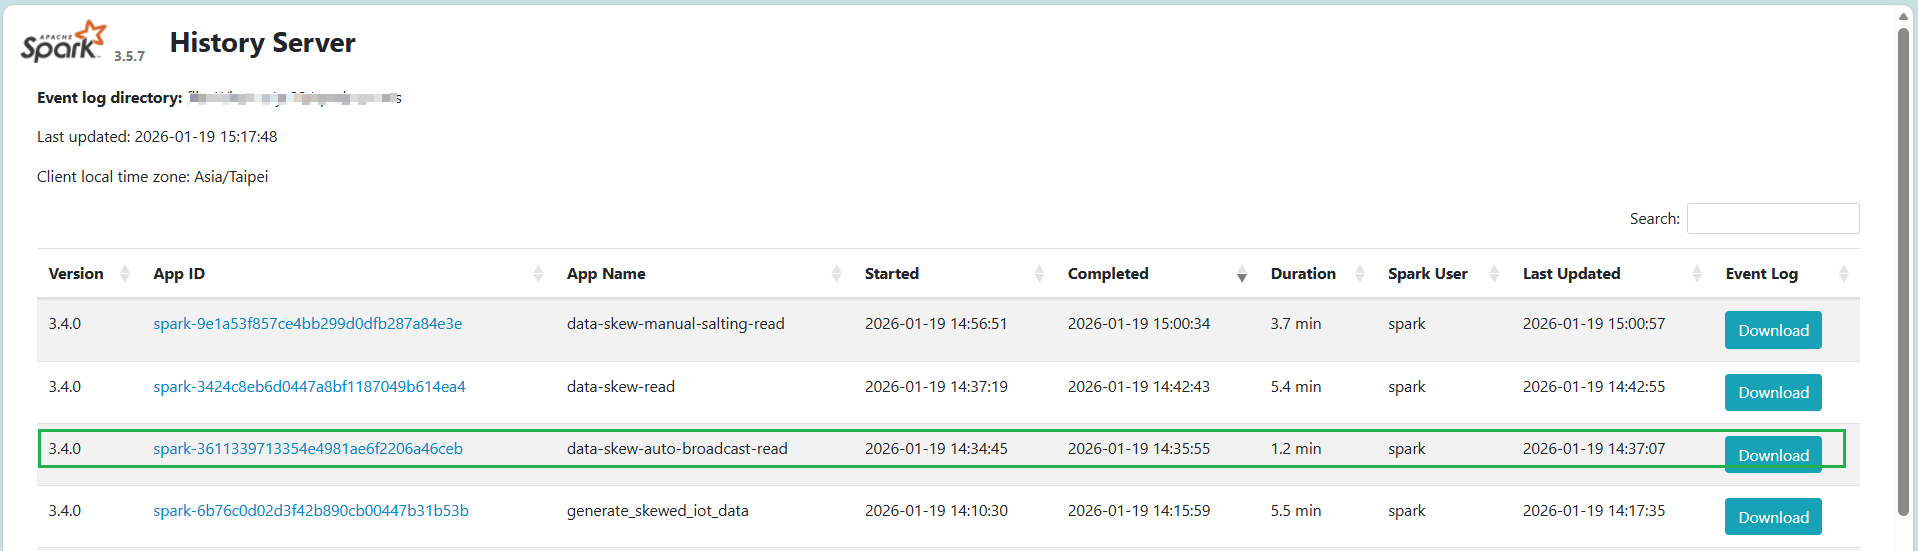
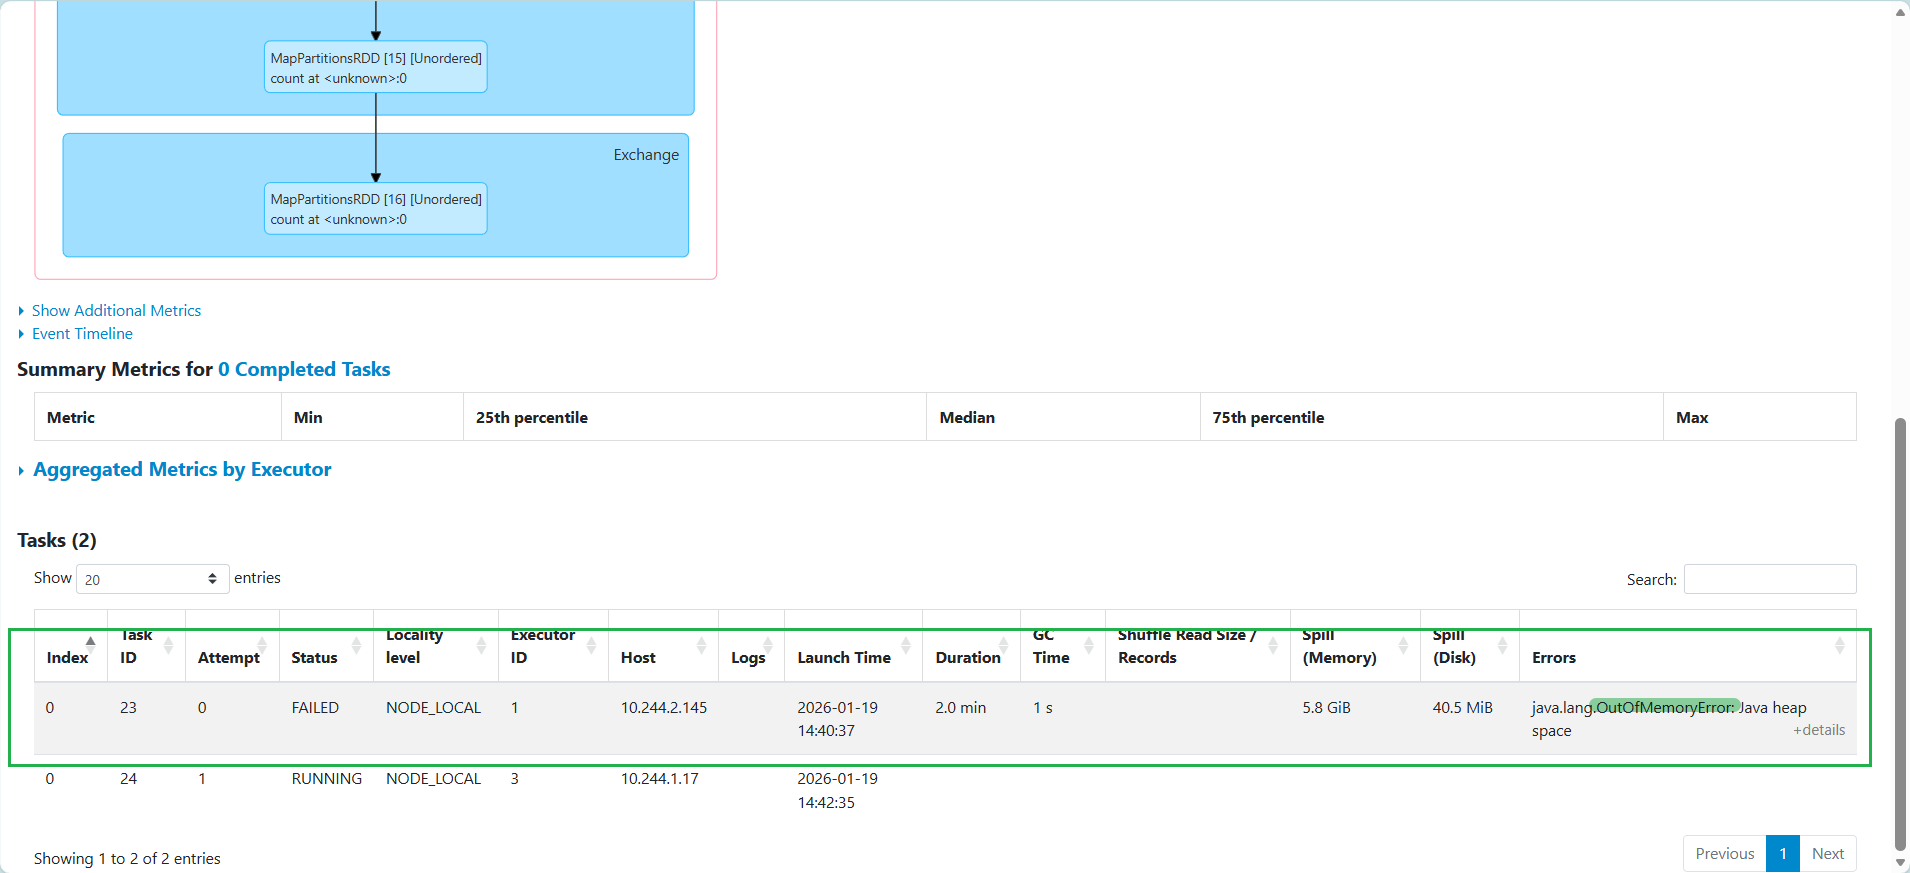
spark-autobroadcast-01.png

方法 3:spark 關掉 autobroadcast

memory 不足,無法完成任務
spark-turnoff-autobroadcast-01.png
spark-turnoff-autobroadcast-02.png

方法 4:手動 salting

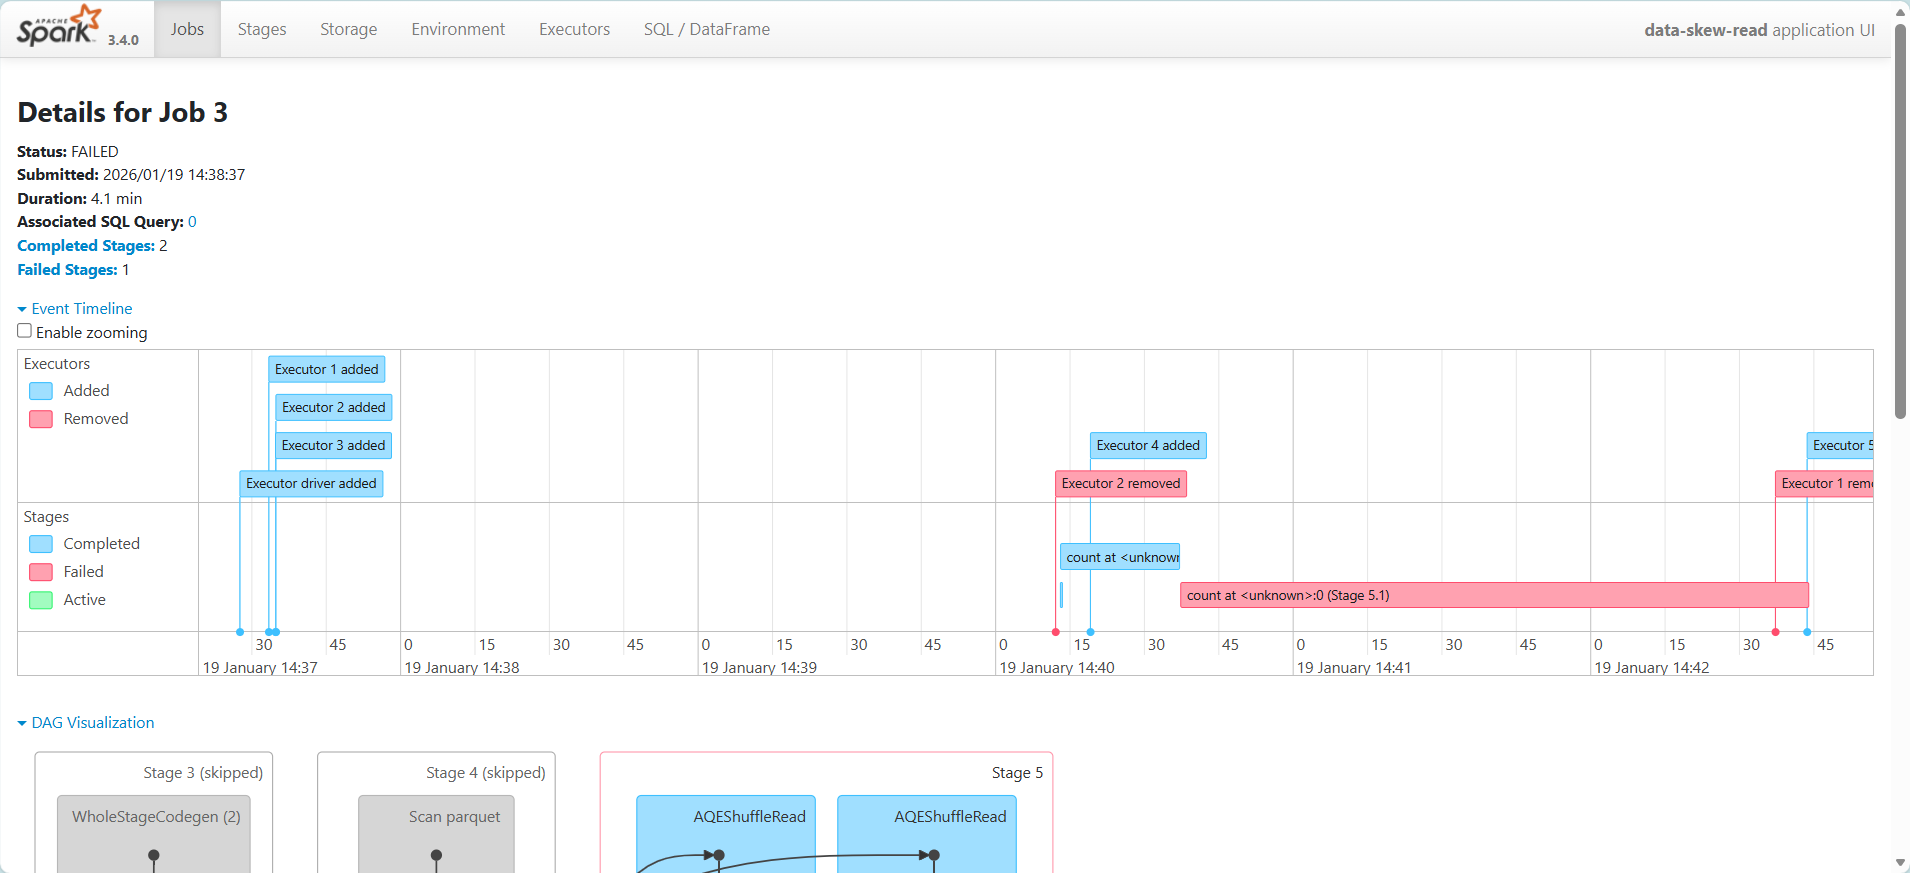
加入 salting 可以讓數據在有限 memory 中「排隊」分批處理,完成任務
salting-01.png
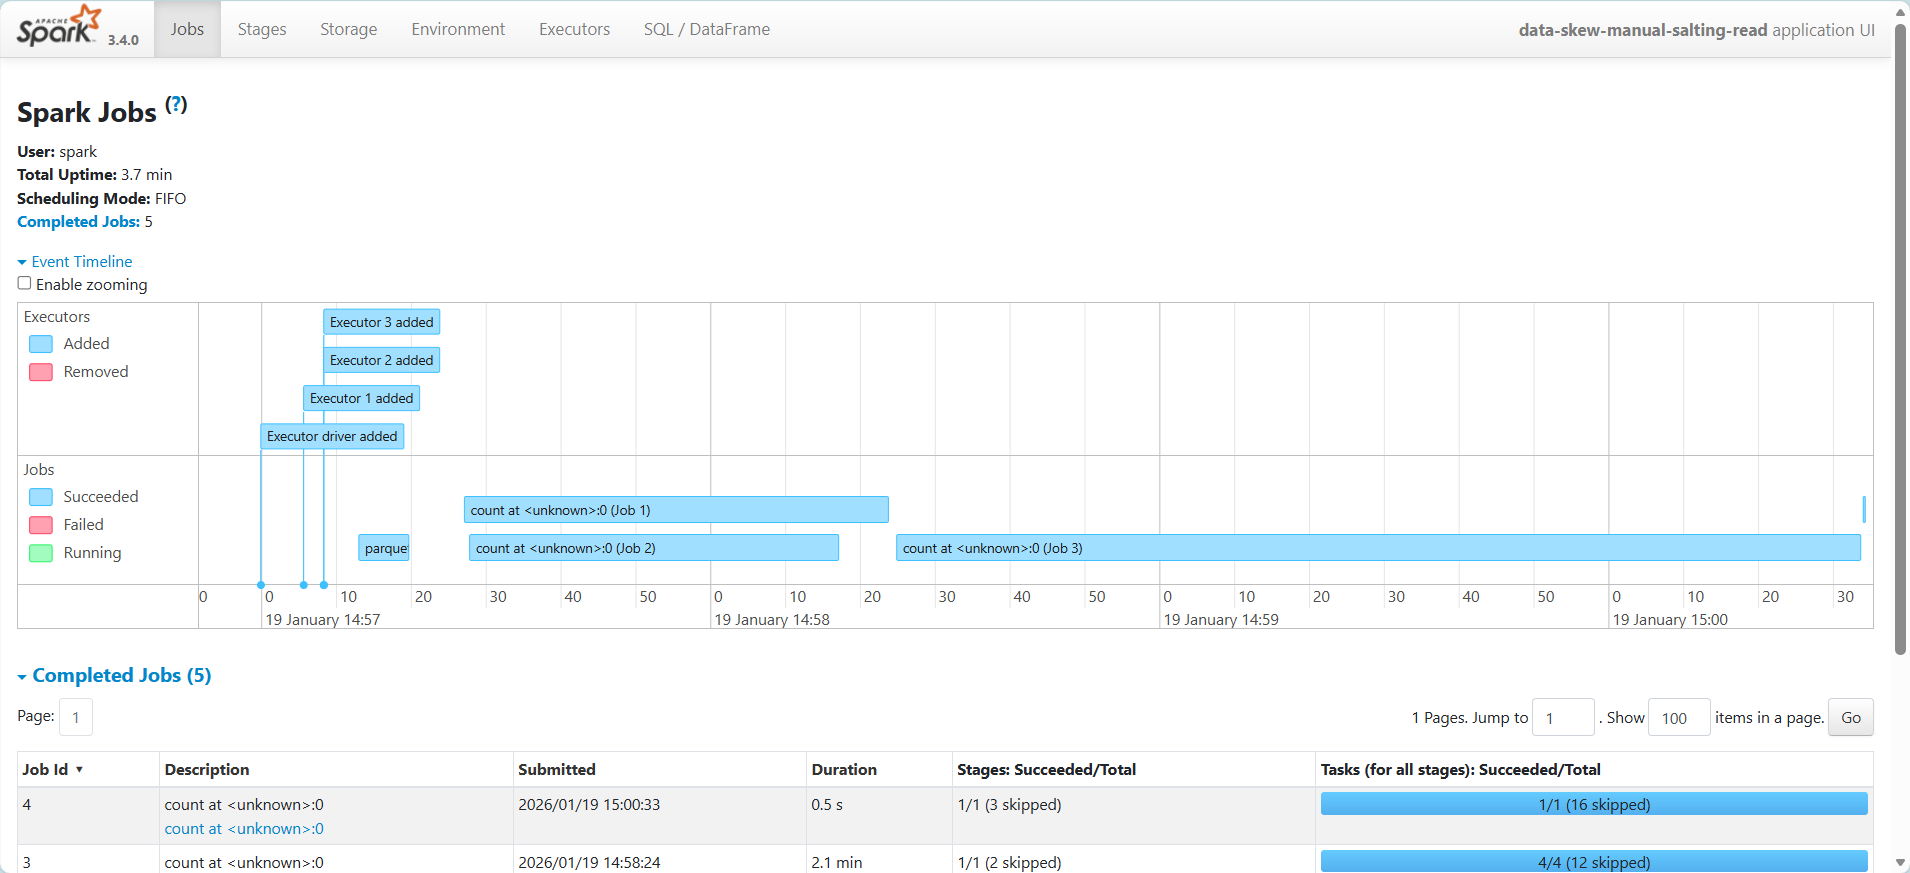
任務被平均分配到 executor 執行,作業時間平均,但是出現 Memory & Disk Spill
salting-02.png
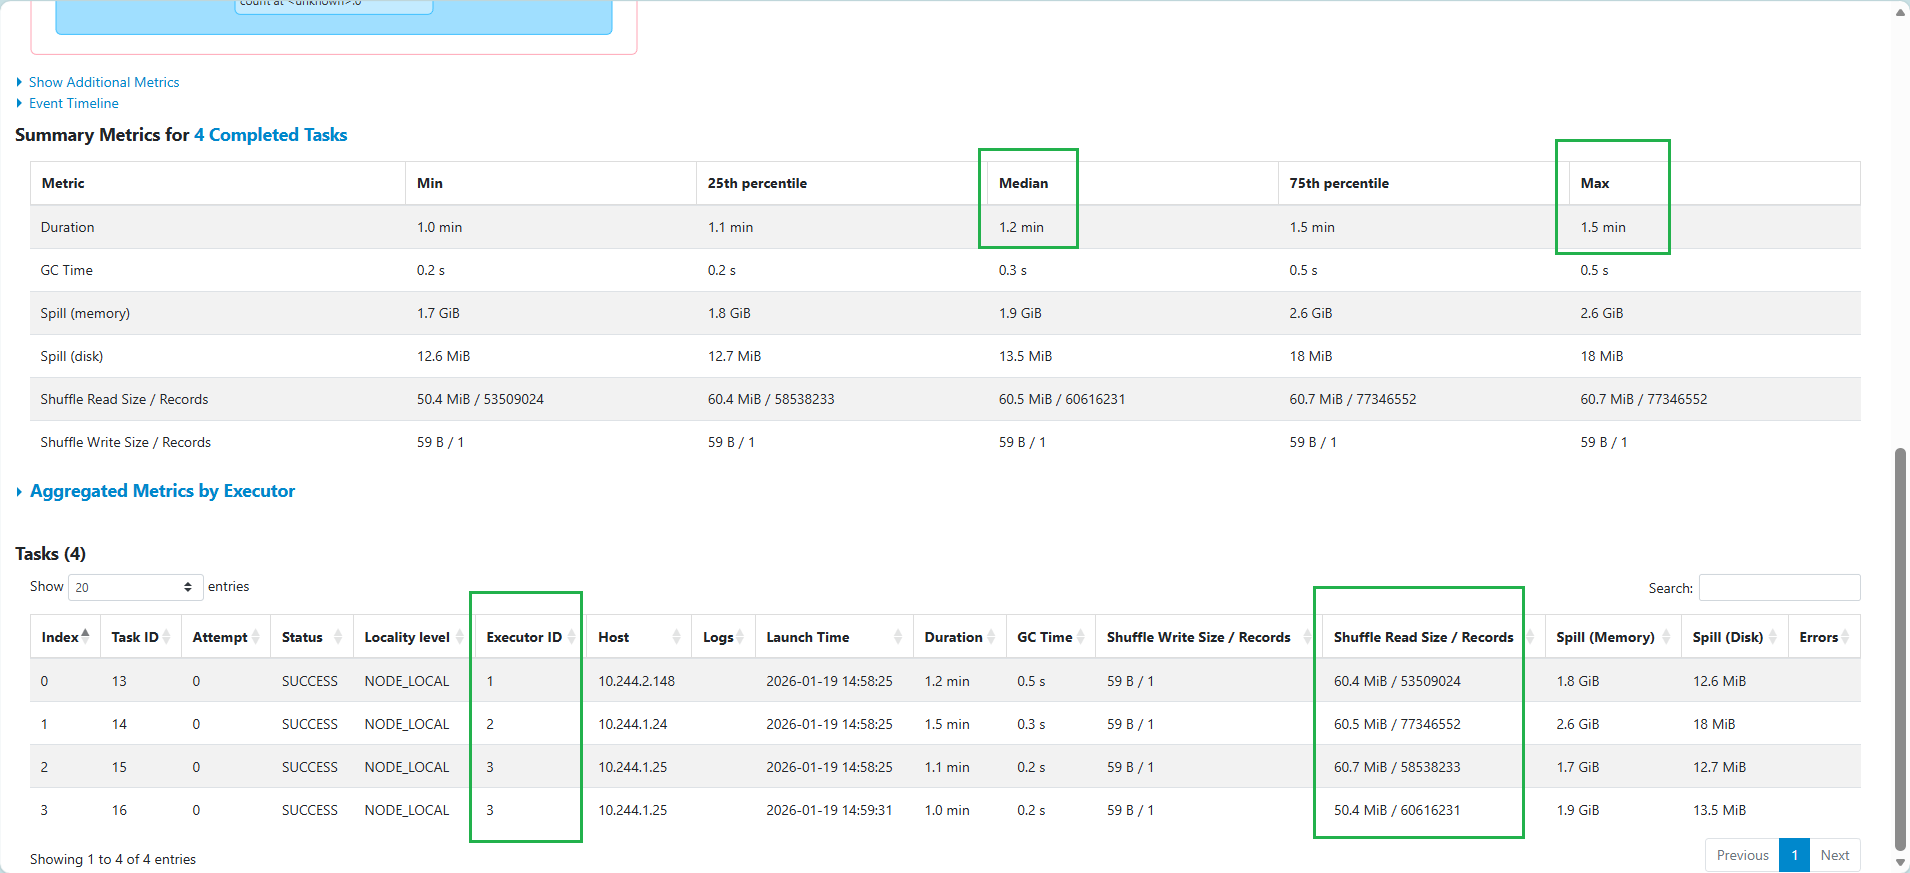
如果拆成更多 partition,可以降低 Memory & Disk Spill,比如切成 400
salting-03.png
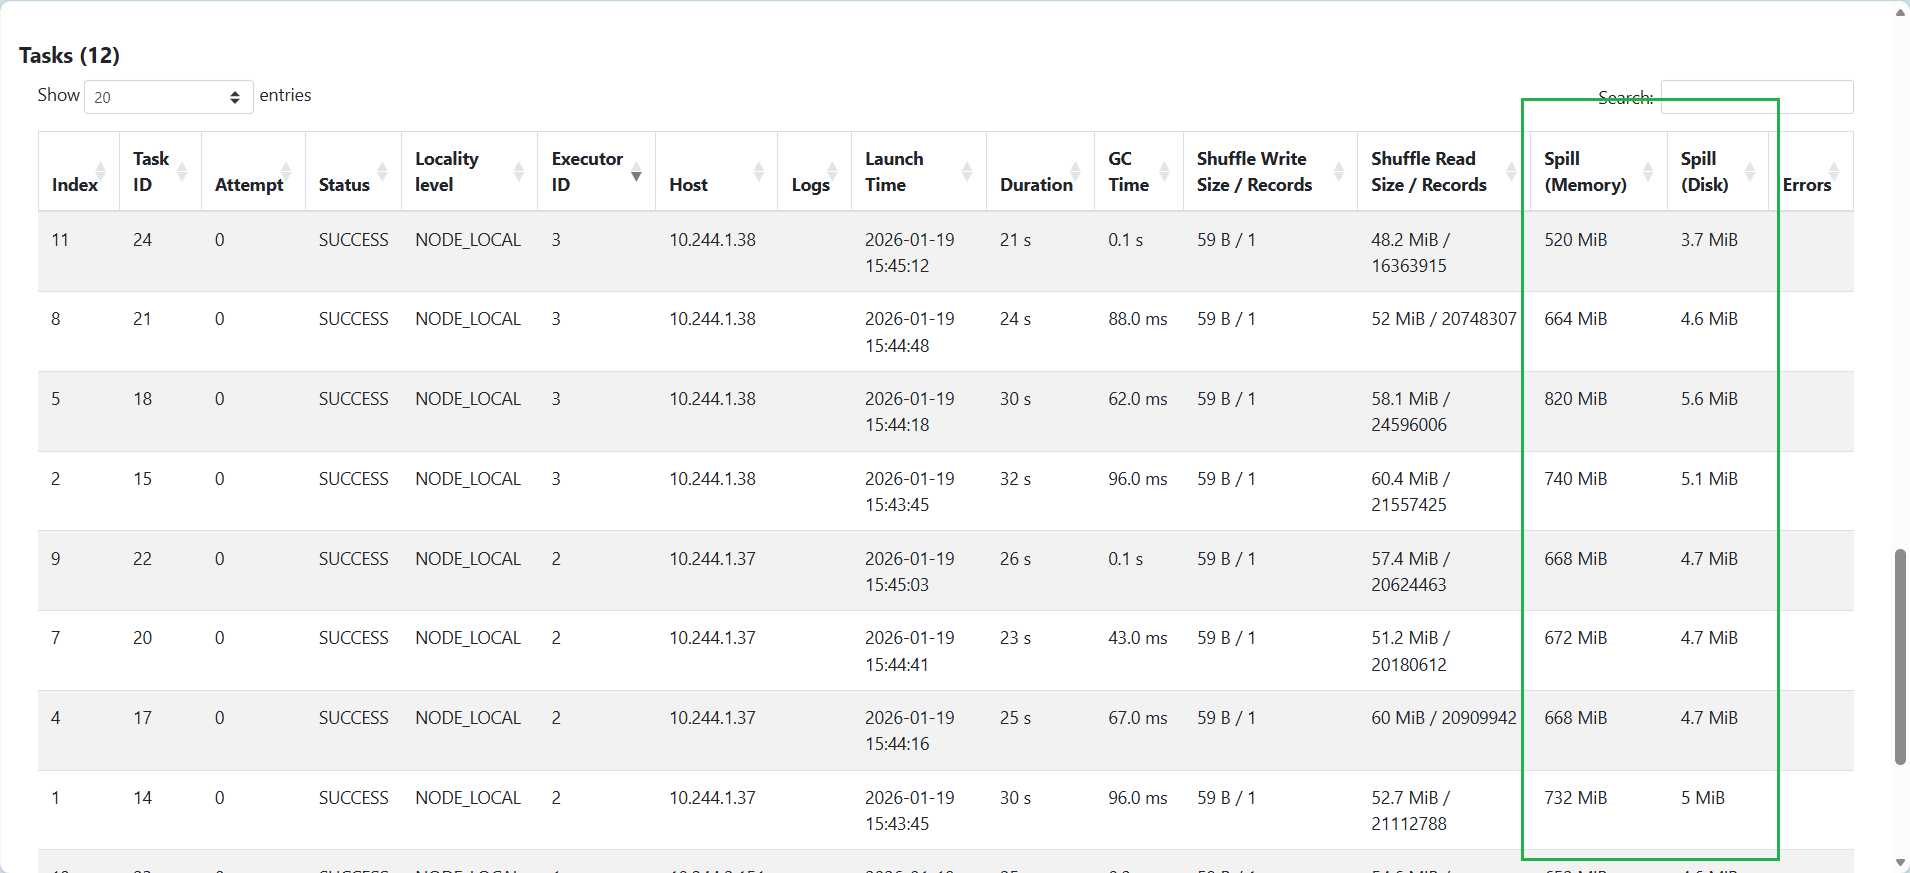
增加 memory 到 5G,沒有 Memory & Disk Spill
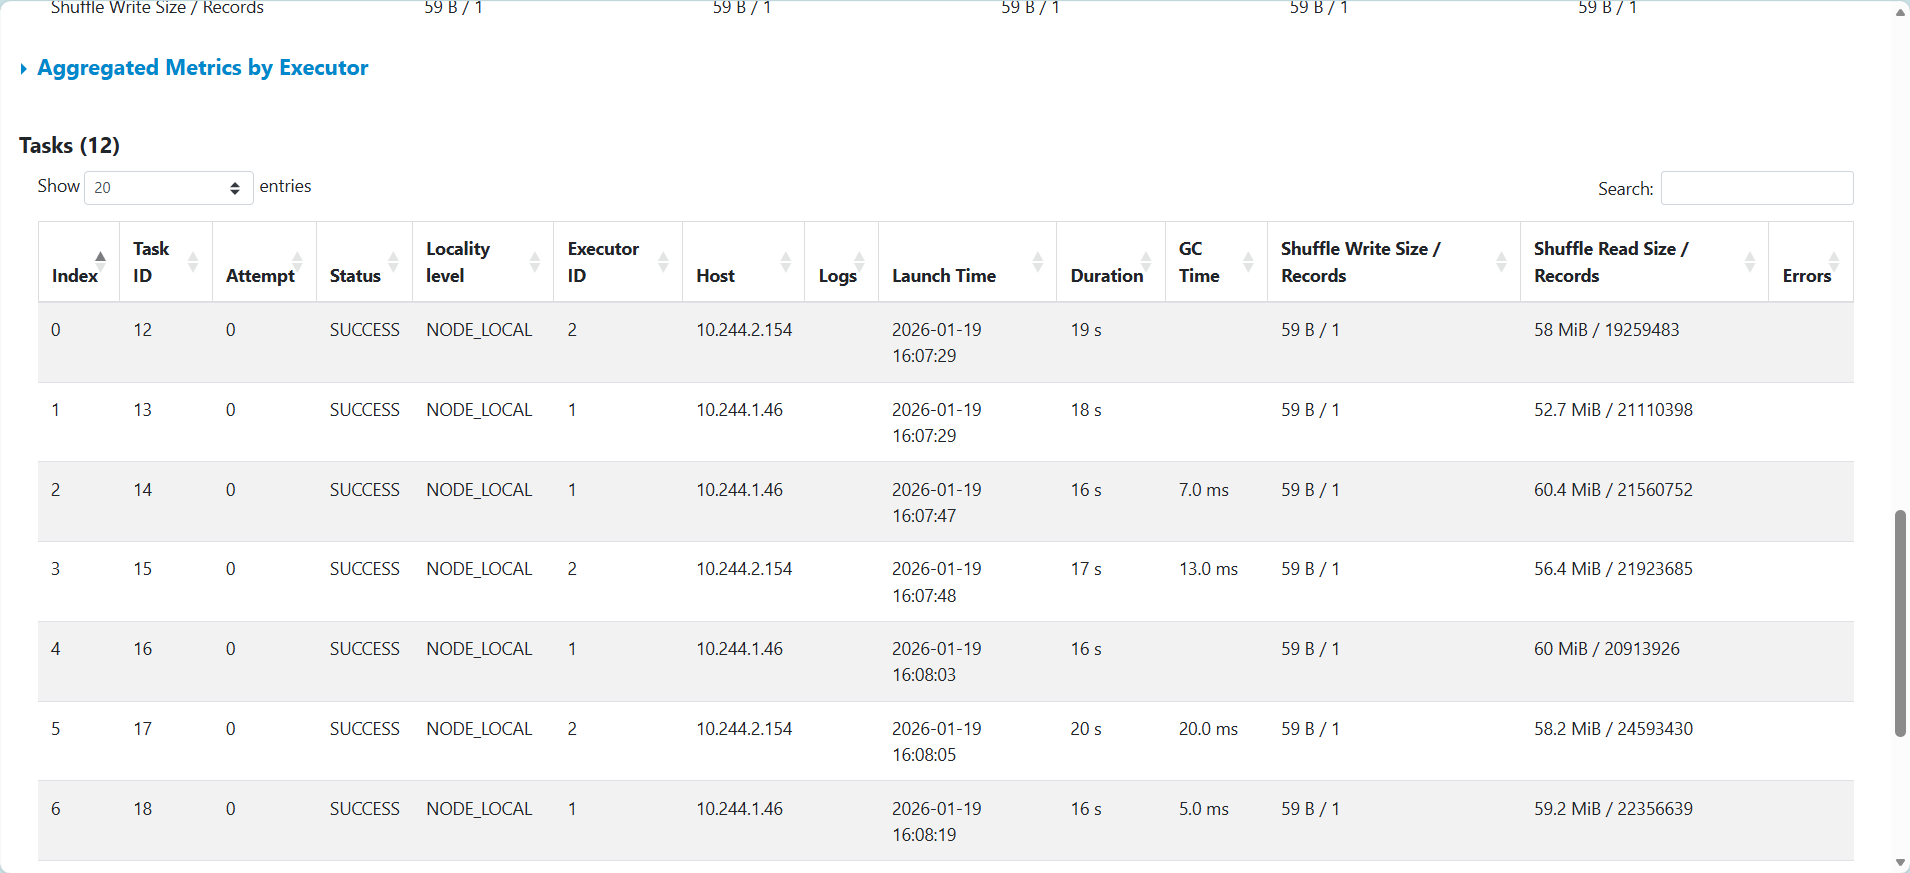
salting-04.png
但實際作業時間變長
salting-05.png

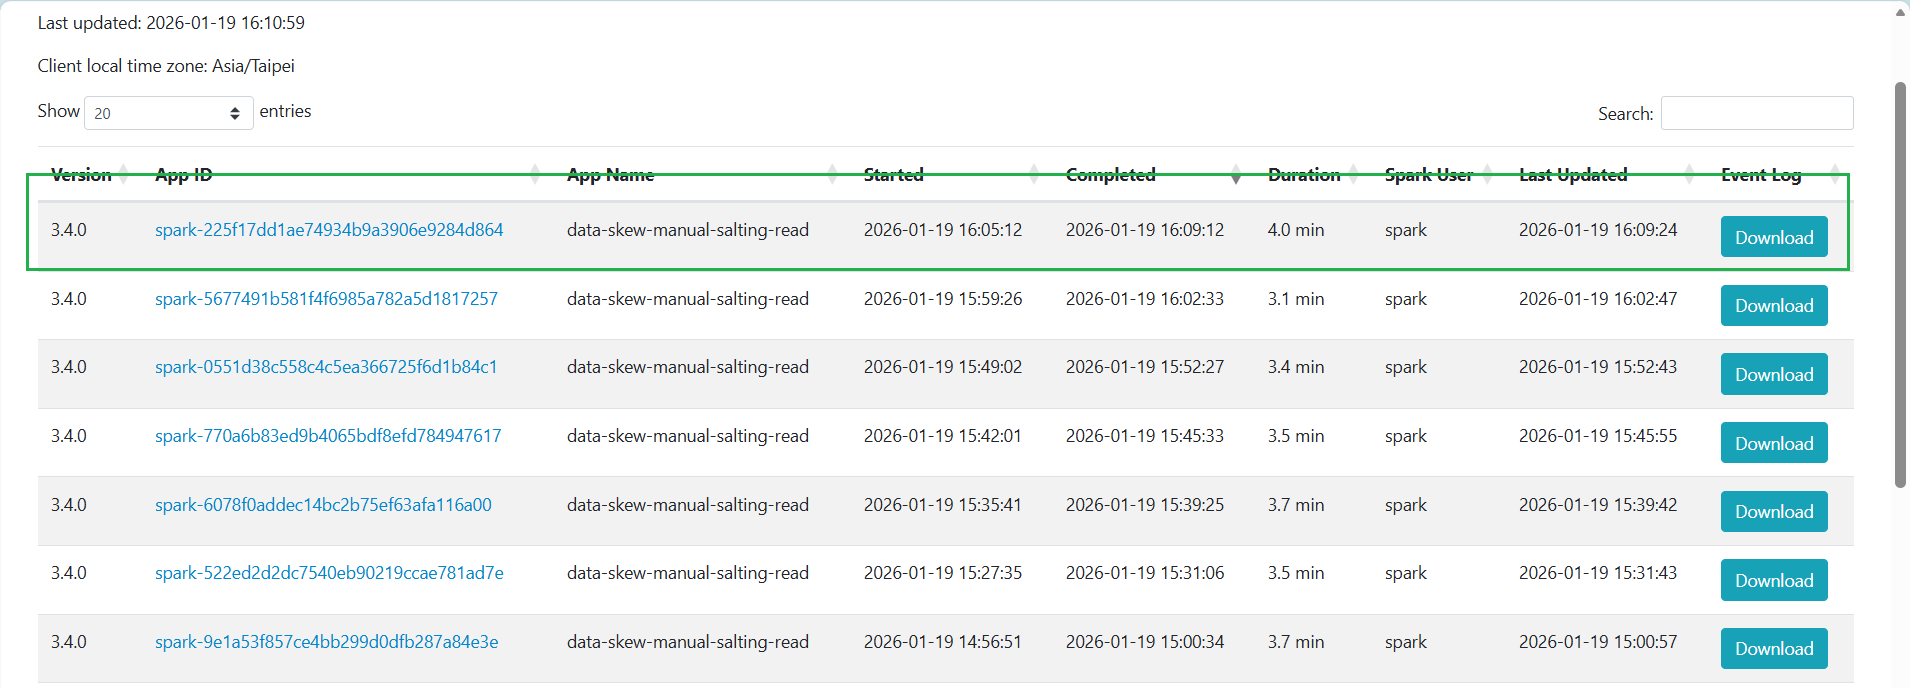
程式碼 repo:yuchun33/data-skew-exp

DONE.

如果資源 (asset) 是吻合 USD 格式的,它就可以被 Omniverse 解析和任意使用,概念上是這樣。但如果操作者是對 3D 開發陌生的職員,要實現順暢操作可能會沒有辦法很理所當然,但如果真的把步驟湊齊了,也還是會覺得沒那麼複雜。

因為業務需求接觸 Omniverse 這套模擬工具,在對電腦模擬、GPU 運算、電腦 3D 視覺都很陌生的背景之下,經過頻繁的比對文件、驗證和實作,在此分享我對這個工具截至目前能分享的心得。

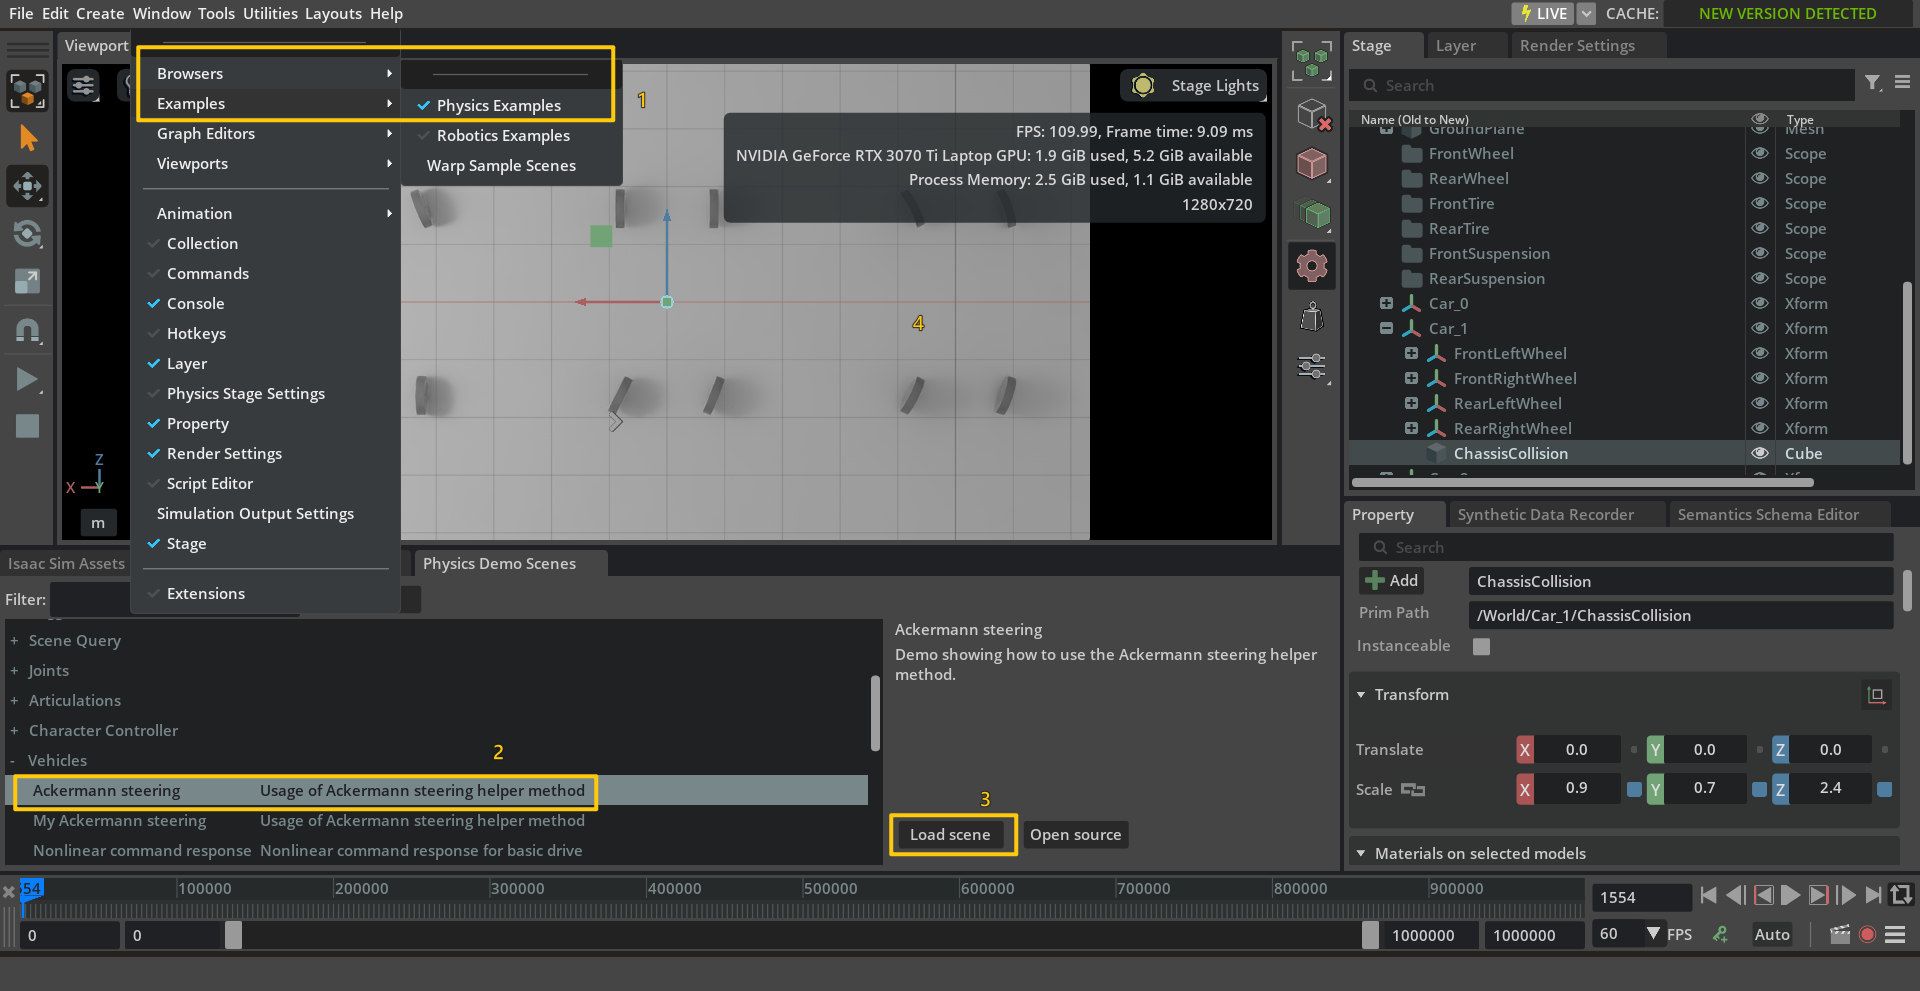
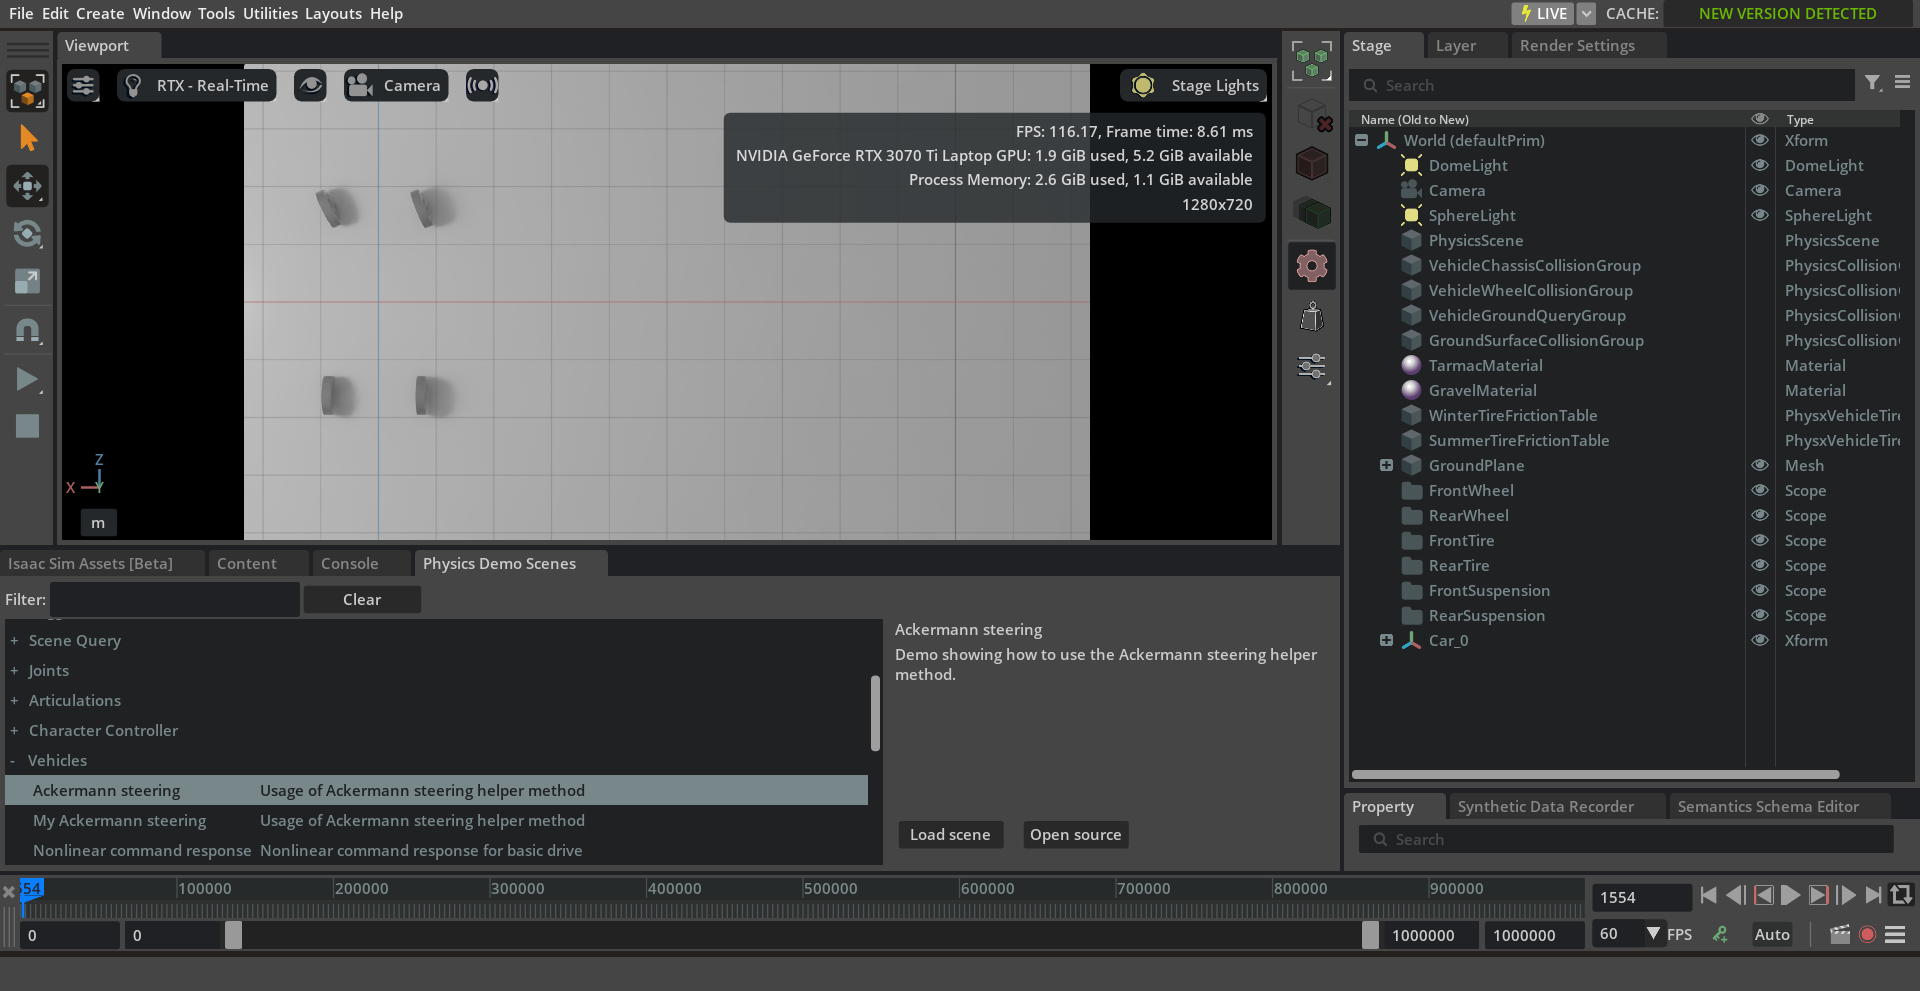
業務需求是交通相關主題,幸運的是 Nvidia 有提供簡易外觀但屬性完整的四輪車模型。會基於這份檔案:
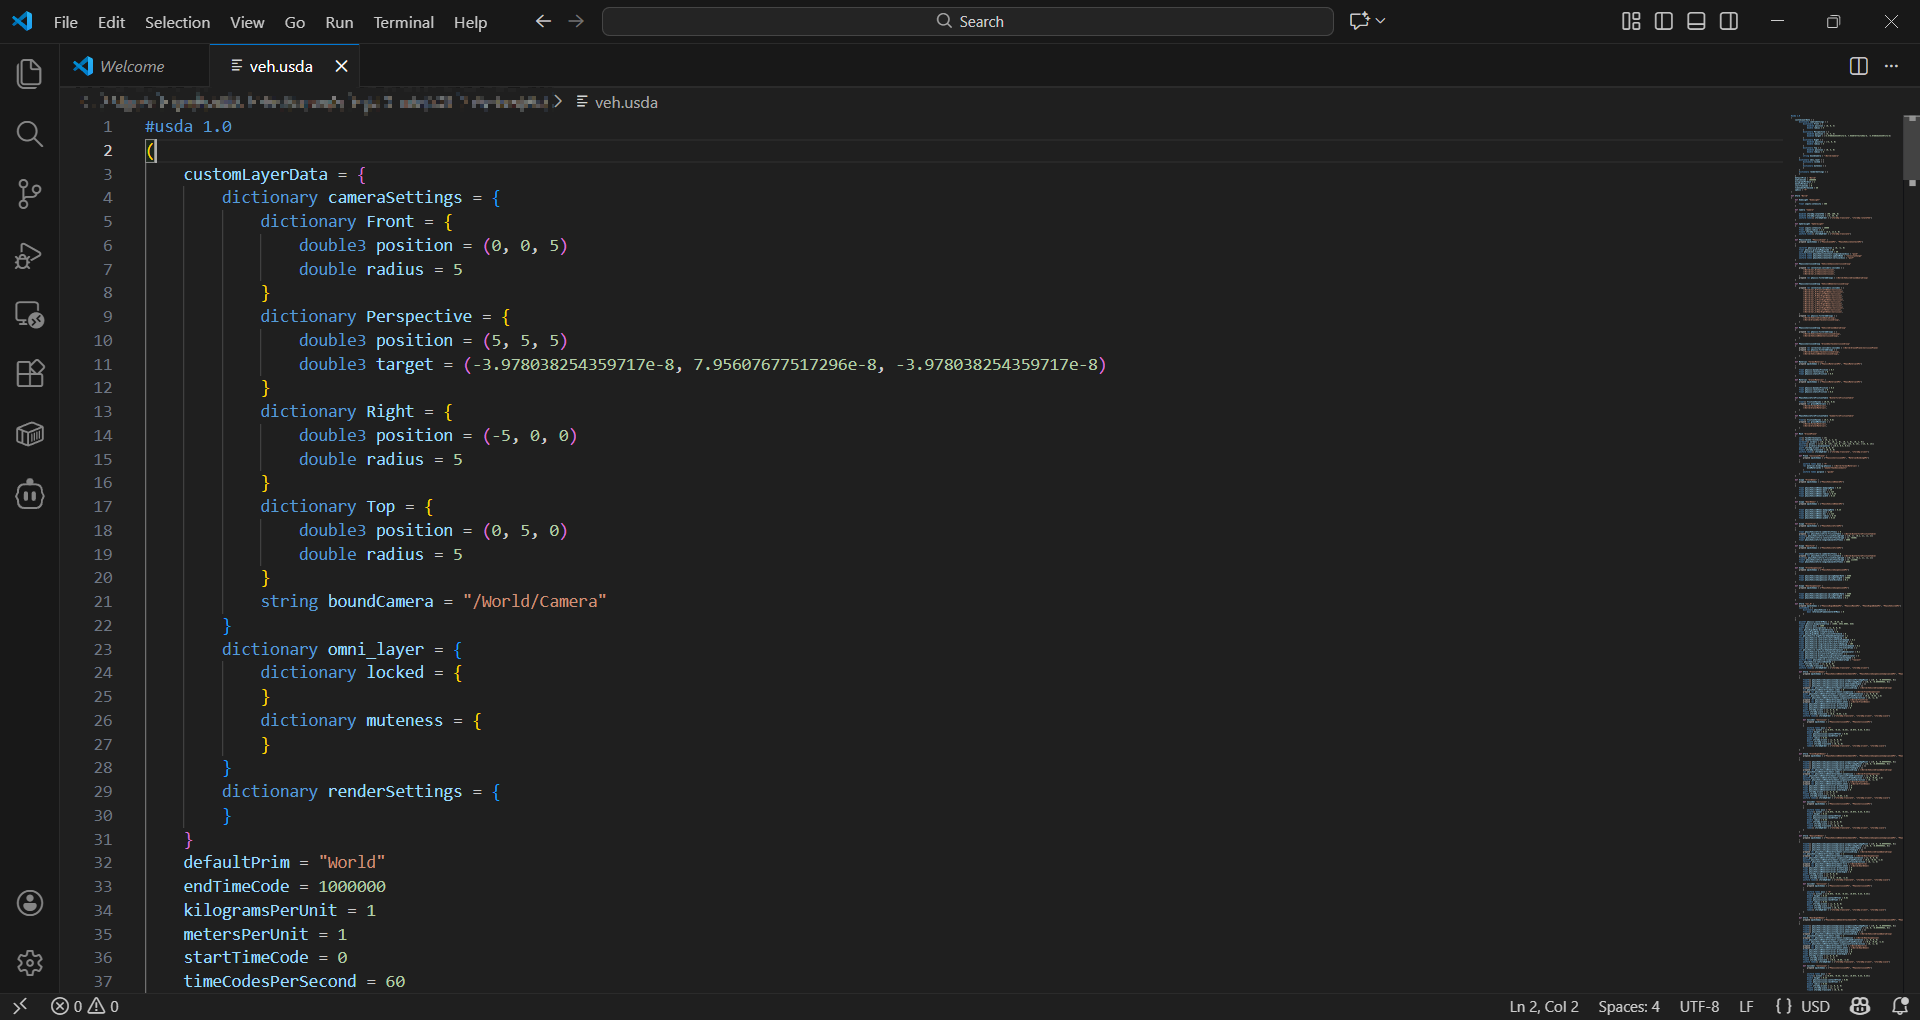
  1. 修改
  2. 引入使用
  3. 確保方向一致

保留一台車

  1. 從 window/examples/physics examples 中找到內建的 ackermann steering 範例,按下 Load scene 後可以看到有三組沒有車身只有四顆輪子的四輪車。
    image01.png
  2. 把 car_1 和 car_2 刪除
    image02.png
  3. 另存成 .usda 檔案 (存在哪裡都可以)
    image03.png
  4. 用 vscode 打開 (或自己習慣的編輯器),會看到所有元件的屬性,包含四輪車的。從這個檔案上下左右比對,可以猜出屬性的關聯和綁定關係。
    image04.png
  5. 在 isaac sim 開啟新專案,檢查剛剛輸出的 usda 檔案可不可以重新匯入到 isaac sim 的視窗

方法 a:import(不能用 import 的,不支援 usd 格式)

方法 b:open(可以,會跟儲存成 usda 時的狀態一模一樣)

image05.png

方法 c:先建立一個 xform 再用 add reference 的方式匯入,看起來可行。

image06.png

方法 d:用程式碼的方式,方向不一致。

1
2
3
4
geom = UsdGeom.Xform.Define(stage, path)
geom.GetPrim().GetReferences().AddReference(
"./veh.usda"
)

image07.png
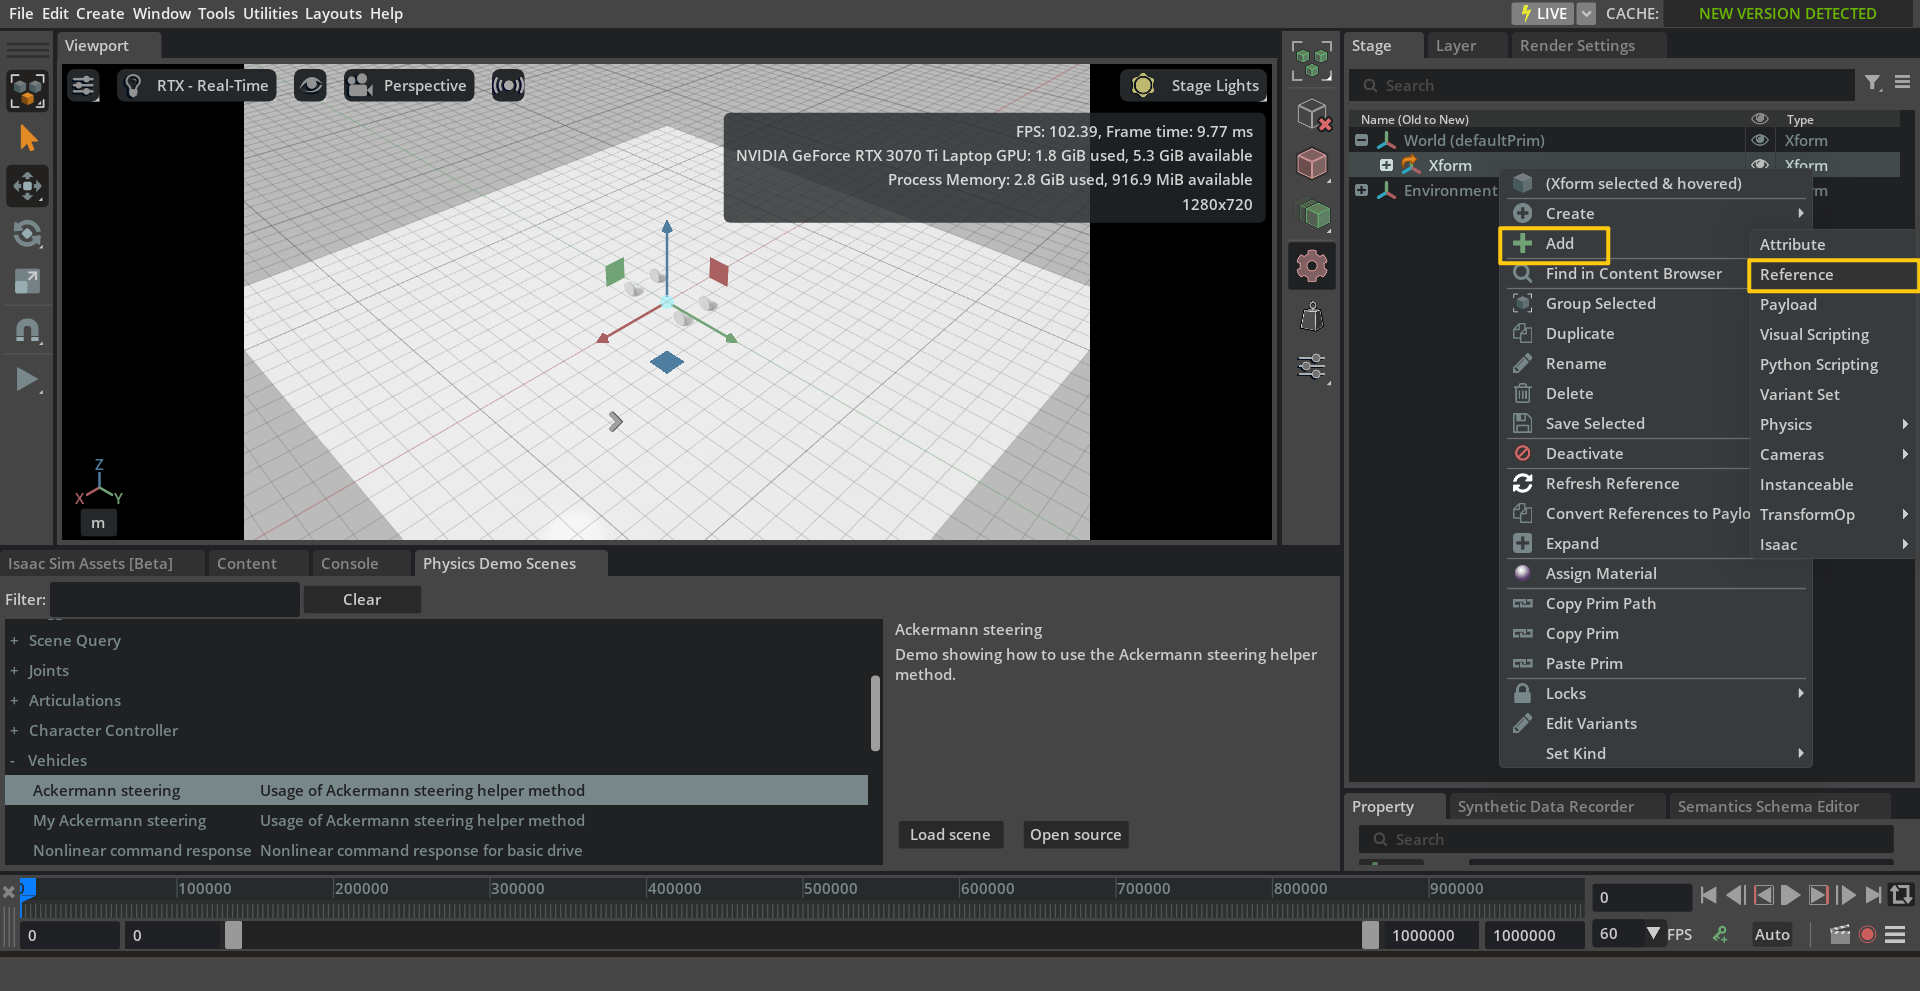
這時候如果再建立一個 xform 再用 add reference 的方式匯入,方向是正確的
image08.gif
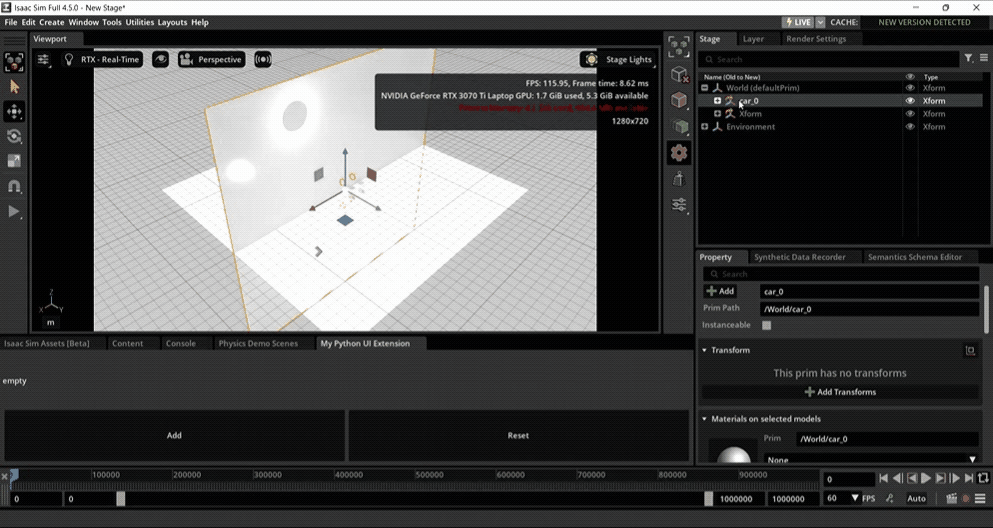
回頭看 ackermann steering 匯入後的環境,是 Y up。目前推測使用內建的 add reference(方法 c) 會自動轉換,但如果是自己的程式碼就需要自己轉換。
image09.png
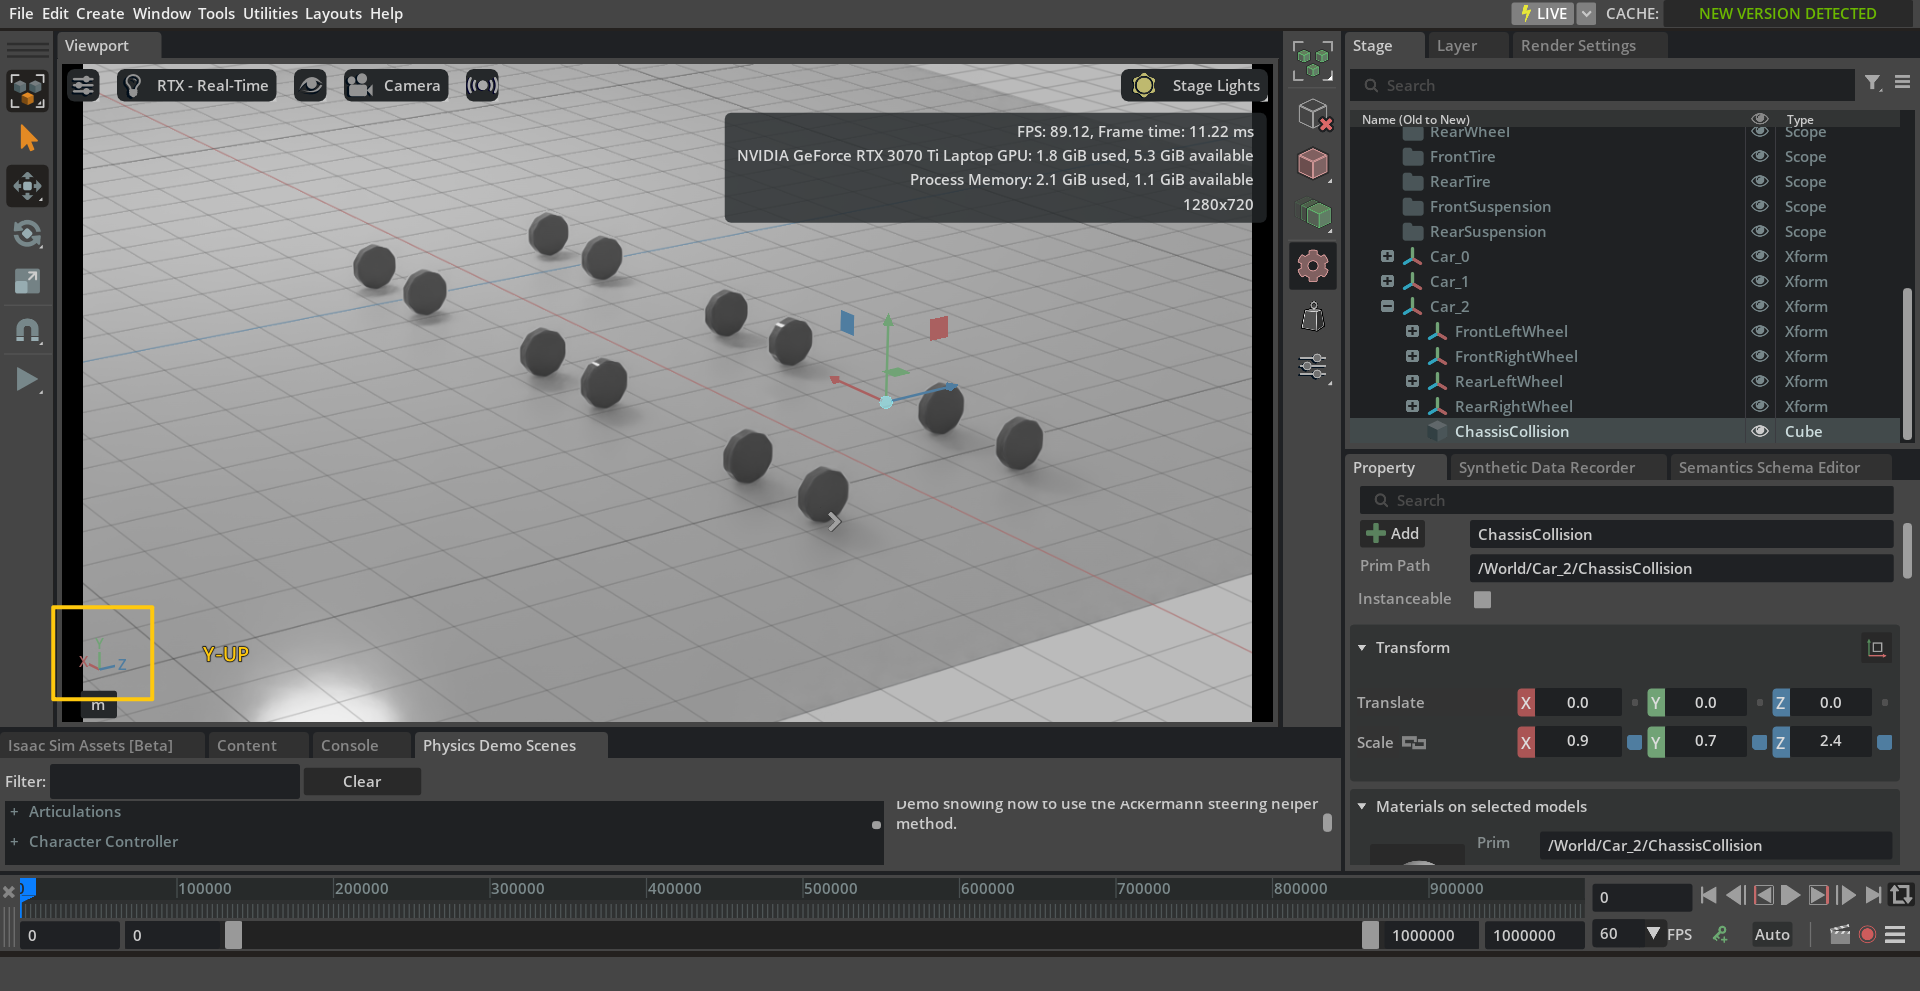
所以要去哪裡轉換?把心思放回 ackermann steering 的 source code。在匯入前環境是 Z up,匯入後才被轉換成 Y up。
確實有 gYZXAxes = AxesIndices(1, 2, 0) ,但要如何訂正?
有兩個方法:把 stage 改成 Y up 或把 veh.usda 改成 Z up,選一個適用專案的即可 (譬如其它需要匯入的模型預設是 Z up)

解法 1:把 stage 改成 Y up

1
2
3
4
5
from pxr import UsdGeom

ctx = omni.usd.get_context()
stage = ctx.get_stage()
UsdGeom.SetStageUpAxis(stage, UsdGeom.Tokens.y)

解法 2:讓 veh.usda 是 Z up

這邊用的方法是到 ackermann steering 的 source code 找到 create4WheeledCarsScenario,把參數 axesAxesIndices(1, 2, 0) 改成 AxesIndices(2, 1, 0)。修改後要重新啟動 isaac-sim 才會生效,這個方法只適用在這個範例,但我也是透過這段 trace 才找到 UsdGeom.SetStageUpAxis(stage, UsdGeom.Tokens.y)

存檔後即可解決使用方法 d 匯入模型但方向不一致的情形。

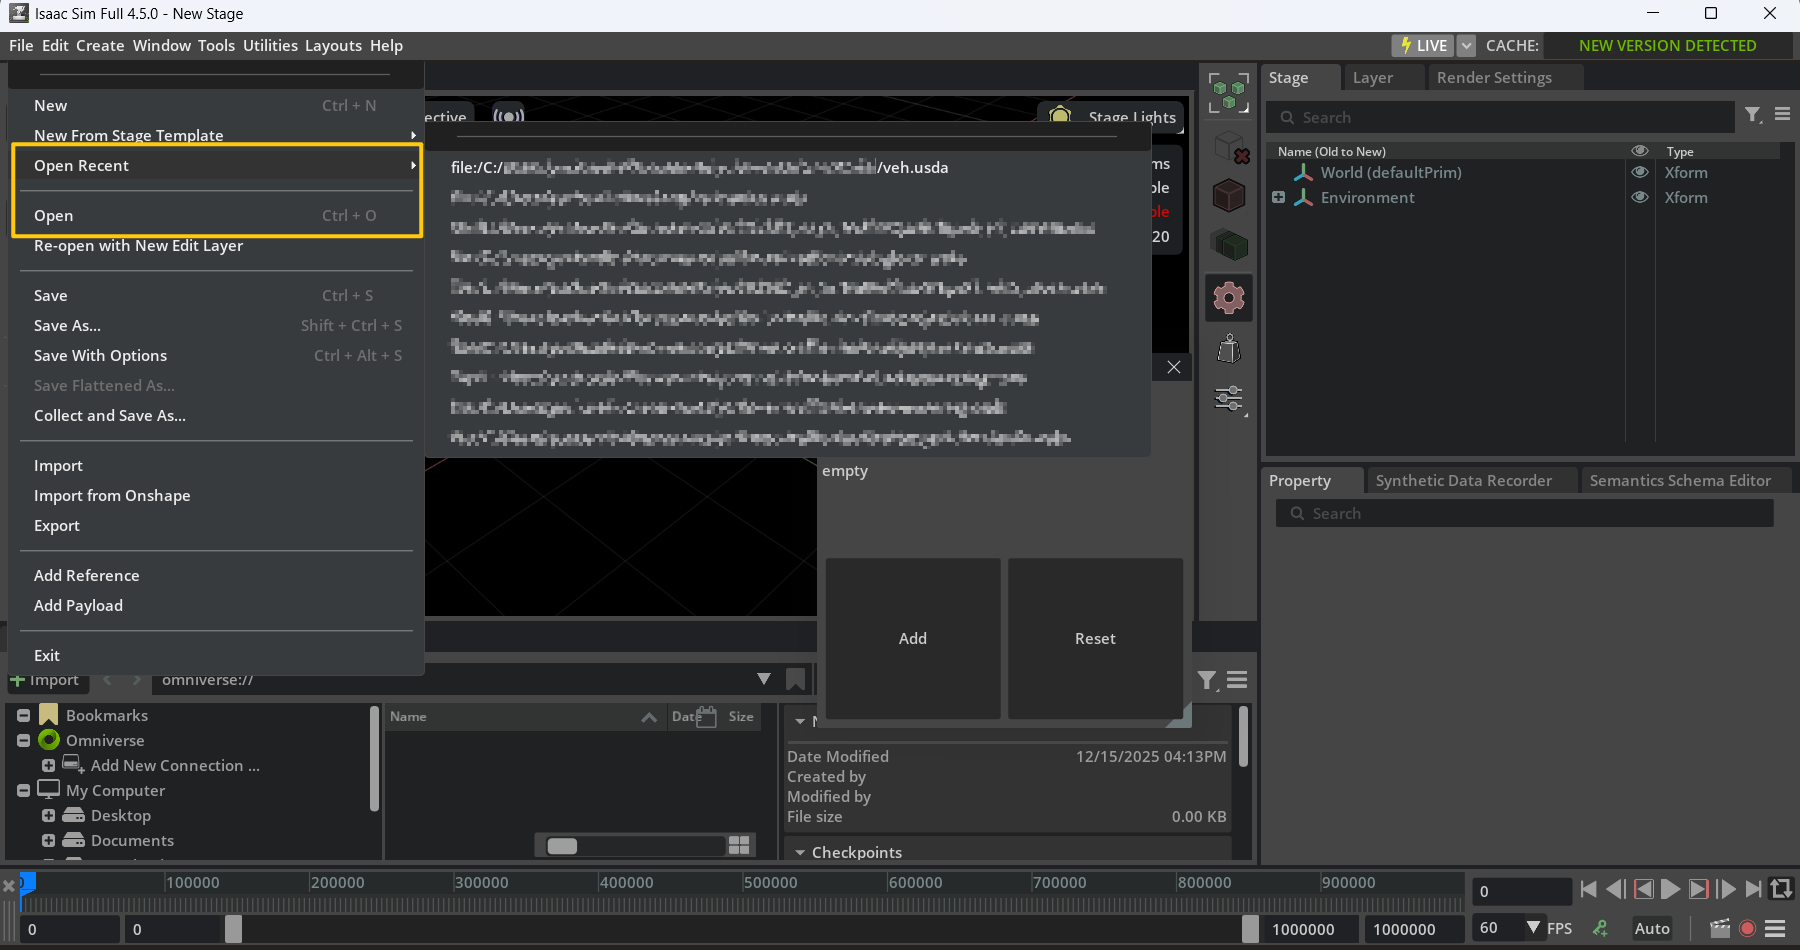
第一步:下載 isaac-sim Download Isaac Sim — Isaac Sim Documentation,直到可以點選 isaac-sim-standalone@4.5.0-rc.3/isaac-sim.bat(版本可能不同,2025/12/12 當下已有 v.5.0)

.bat

1
2
3
4
5
6
7
8
9
10
11
12
13
14
15
16
17
18
19
20
# 下載 isaac-sim-standalone@4.5.0-rc.3 後有預設的 isaac-sim.bat 可以使用
# 解讀 isaac-sim.bat 內的指令
@echo off
setlocal
call "%~dp0kit\kit.exe" "%%~dp0apps/isaacsim.exp.full.kit" --ext-folder "%~dp0/apps" %*

# ------------------------------------------------------------------ #
# "%~dp0kit\kit.exe": 執行 kit.exe,也就是 Omniverse 的核心引擎。
# "%%~dp0apps/isaacsim.exp.full.kit": 告訴 Kit 引擎要啟動哪個應用程式配置。.kit 檔案裡面定義了依賴項、設定和要載入的預設 Extension。
# --ext-folder "%~dp0/apps": 告訴 Kit 除了預設路徑外,還要到這個資料夾下尋找可用的 Extensions。
# %*: 傳遞參數。將你執行這個 .bat 檔時後面所帶的所有參數(例如 --vulkan 或 --no-window),全部原封不動地傳給 kit.exe。
# ------------------------------------------------------------------ #


# 所以如果想要客製化自己的專案,我使用的方法是複製 isaac-sim.bat 後改名成 my-isaac-sim.bat
# 並修改成
@echo off
setlocal
call "%~dp0kit\kit.exe" "%%~dp0apps/my-isaacsim.exp.full.kit" --ext-folder "%~dp0/apps" %*

.kit

1
2
3
4
5
6
7
8
9
10
11
12
13
14
15
16
17
18
# 接下來可以去看看 apps/my-isaacsim.exp.full.kit 裡面寫了什麼
# .kit 其實就是一個 TOML 格式的文字檔案,就像 .json 是一個 json 格式的文字檔。
# kit.exe 會依據 .kit 設定的數值啟動服務
# 稍微瀏覽 .kit 裡面的屬性

# 有這些節
# [package]
# [dependencies]
# [settings]
# [settings.app]
# [settings.app.exts.folders]
# [settings.exts."omni.kit.registry.nucleus"]

# 可以看 [dependencies],是啟動 my-isaacsim.exp.full.kit 需要使用到的 extension,這邊是關鍵,目前我都是在這邊增加客製的 extension,跟這篇文章有關的是這兩個
"omni.services.transport.server.http" = { version = "1.3.1" }
"my-extension-sync" = {}

# 接下來用滑鼠點擊 my-isaac-sim.bat,會看到 isaac-sim 視窗打開了,更重要的是從瀏覽器輸入 http://localhost:8011/docs 可以看到 api server 啟動了

omniverse 有內建的 api server 可以啟用,不用自己設定。

1
2
3
4
5
6
7
8
9
# 在 .kit 內的 [dependencies] 加上
"omni.services.transport.server.http" = { version = "1.3.1" }

# 從 isaac-sim-standalone@4.5.0-rc.36\extscache\omni.services.transport.server.http-1.3.1\config\extension.toml 可以看到 port 和 url
# 瀏覽器輸入 http://localhost:8011/docs 可以看到 api server 啟動了
# https://docs.omniverse.nvidia.com/services/latest/design/getting_started.html
exts."omni.services.transport.server.http".http.enabled = true
exts."omni.services.transport.server.http".host = "0.0.0.0"
exts."omni.services.transport.server.http".port = 8011

extension

產生 extension 需要使用 kit-app-template 這個工具 https://github.com/NVIDIA-Omniverse/kit-app-template?tab=readme-ov-file#quick-start

1
2
3
4
5
6
7
8
9
10
11
# 下載 kit-app-template
git clone https://github.com/NVIDIA-Omniverse/kit-app-template.git

# 進入 kit-app-template 資料夾
cd kit-app-template

# 使用 .repo 產生 application 或 extension
# linux
./repo.sh template new
# window
.\repo.bat template new

image.png

1
2
# 接下來只要把整個 extension 資料夾複製到 /isaac-sim-standalone@4.5.0-rc.36/exts 內就可以在 my-isaacsim.exp.full.kit 內的 [dependencies] 加上
"my_company.my_python_ui_extension" = {}

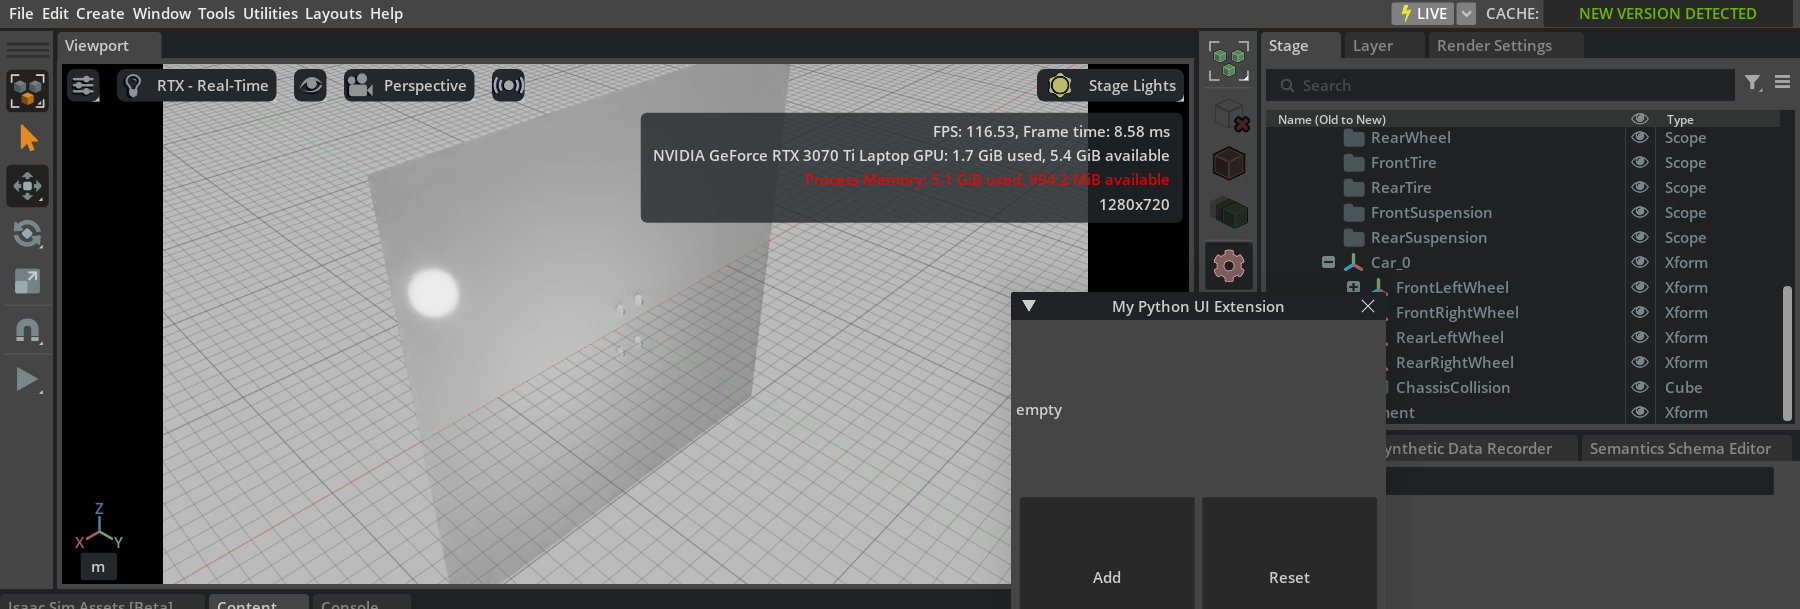
啟動 my-isaac-sim 可以看到建立的 extension。

image 1.png

如果沒有自動出現可以去 window/extensions 內 enabled

image 2.png

測試用 api 可以觸發產生 cube

1
2
3
4
5
6
7
8
9
10
11
12
13
14
15
16
17
18
19
20
21
22
23
24
25
26
27
28
29
30
31
32
33
34
35
36
37
38
39
40
41
42
43
44
45
46
47
48
49
50
51
52
53
54
55
56
57
58
59
60
# 修改 \isaac-sim-standalone@4.5.0-rc.36\exts\my_company.my_python_ui_extension\my_company\my_python_ui_extension\extension.py

# 1. 新增的套件
from pydantic import BaseModel, Field
from typing import List
from pxr import UsdGeom, Gf

# 2. 在 def on_startup(self, _ext_id): 加入
main.register_endpoint(
url="/mcp/spawn_cube",
verb="post",
func=create_cube_handler,
tags=["MCP Actions"],
)

# 3. 加入 create_cube_handler function
class CubeModel(BaseModel):
name: str = Field(..., description="方塊的名稱 (必須唯一)", example="my_box_01")
size: float = Field(100.0, description="方塊的大小")
position: List[float] = Field([0.0, 0.0, 0.0], description="位置 [x, y, z]")


async def create_cube_handler(request: CubeModel) -> dict:
print(f"Received request to create cube: {request}")
# 獲取當前的舞台 (Stage)
ctx = omni.usd.get_context()
stage = ctx.get_stage()

if not stage:
return {"status": "error", "message": "沒有開啟任何舞台 (Stage)"}

# 組合路徑,例如:/World/my_box_01
# 注意:Omniverse 的路徑通常從 /World 開始
path = f"/World/{request.name}"

# 檢查該路徑是否已經存在物件,避免覆蓋
if stage.GetPrimAtPath(path):
return {"status": "error", "message": f"物件 {path} 已經存在!"}

# --- USD 核心操作開始 ---

# A. 定義一個 Cube (立方體)
cube_prim = UsdGeom.Cube.Define(stage, path)

# B. 設定大小
cube_prim.GetSizeAttr().Set(request.size)

# C. 設定位置 (Translation)
# 為了移動它,我們需要加入一個 Translate 的操作 (Op)
xform_api = UsdGeom.XformCommonAPI(cube_prim)
xform_api.SetTranslate(
Gf.Vec3d(request.position[0], request.position[1], request.position[2])
)

# B. 設定顏色 (選用,設為紅色讓它明顯一點)
cube_prim.GetDisplayColorAttr().Set([Gf.Vec3f(1.0, 0.0, 0.0)])

# --- USD 核心操作結束 ---

return {"status": "success", "path": path, "message": f"已建立方塊:{request.name}"}

測試

1
2
3
4
5
6
7

# 用 postman 觸發 http://localhost:8011/mcp/spawn_cube,並且記得設定 body
{
"name": "hello",
"size": 100,
"position": [0,0,0]
}

GifMaker_20251211164844307.gif

如果出現 my_company.my_python_ui_extension 匯入錯誤

1
2
3
4
5
# 到 \isaac-sim-standalone@4.5.0-rc.36\exts\my_company.my_python_ui_extension\config\extension.toml 的 [dependencies] 加上依賴的 extension
[dependencies]
"omni.kit.uiapp" = {}
"omni.services.core" = {}
"omni.services.transport.server.http" = {}

這些綜合起來可以完全自由開發了嗎?好像可以。

  • 善用 isaac-sim-standalone 資料夾內的 example,直接從範例抄需要的功能因為文件很難找: \isaac-sim-standalone@4.5.0-rc.36\standalone_examples

  • 下載 isaac-sim Download Isaac Sim — Isaac Sim Documentation

Welcome to Hexo! This is your very first post. Check documentation for more info. If you get any problems when using Hexo, you can find the answer in troubleshooting or you can ask me on GitHub.

Quick Start

Create a new post

1
$ hexo new "My New Post"

More info: Writing

Run server

1
$ hexo server

More info: Server

Generate static files

1
$ hexo generate

More info: Generating

Deploy to remote sites

1
$ hexo deploy

More info: Deployment

0%